My boyfriend Ste is a big fan of beer. He likes to sample lots of different real ales and craft beers and since he moved in with me he’s been collecting the caps from all of them. I asked him the other day what he intended to do with them, to which he replied he had no idea, but he was sure they would be useful one day.
I already had an idea of what they could be used for, that would also make an excellent addition to our growing barware collection, and decided that I would make it for him as a surprise whilst he was away for work in Copenhagen. I also thought if I told him what I planned to do, he would think it was too difficult and be worried about me ruining his precious collection. To be fair, I also had my moments of doubt throughout the project, and had thoughts of him coming home and wondering where they’d all gone, whereupon I’d have to confess to having ruined them, but thankfully when he came home his reaction was amazement, gratitude and lots of kisses. So I think I did okay!
This post is my second time joining in the DIY Sunday Showcase with Jennifer, Shelly, Marie, Megin, Katie and Erin. I am totally honoured that Jen decided to feature my pallet garden from last week – it’s my first time being featured at a link party and it’s every bit as thrilling as I thought it would be. As I said to Jen, it has totally made my month…forget week! It’s too exciting for that. I’ve not been blogging all that long and to have such established and brilliant bloggers like what I’m doing is not only a huge encouragement that I’m doing something right, but it also feels kind of like acceptance – maybe I really am a blogger now? Thanks to all of you for a great party and for inspiring all of us, especially me!
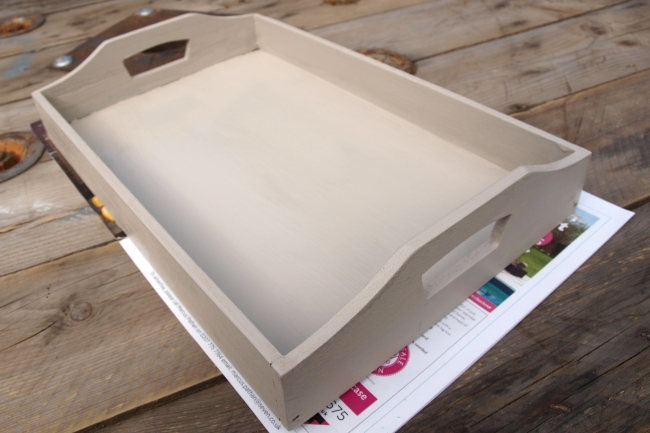
This project would work brilliantly with an old thrifted tray from a car boot sale (yard sale if you’re reading in the US!), but I didn’t have one suitable and I had a limited three day period in which to get cracking with this project so I bought a cheap £3.99 basic wooden one on eBay. It was no frills, and needed a decent sanding before I started because there were quite a lot of splintery unfinished edges, and the bottom was very flimsy (I wouldn’t trust it with a few full bottles on), but I knew the addition of half an inch of resin and some metal bottle caps would fix that.
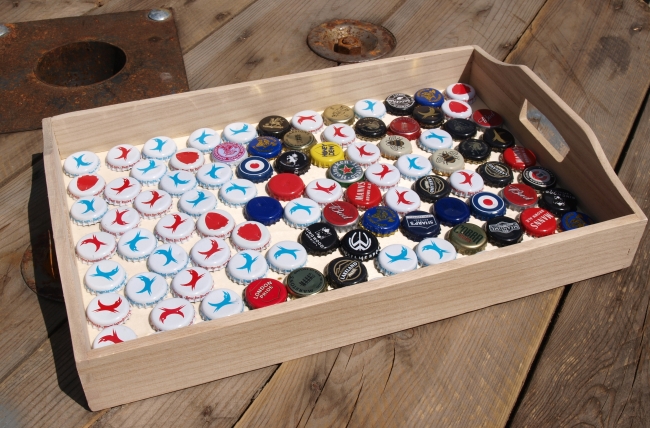
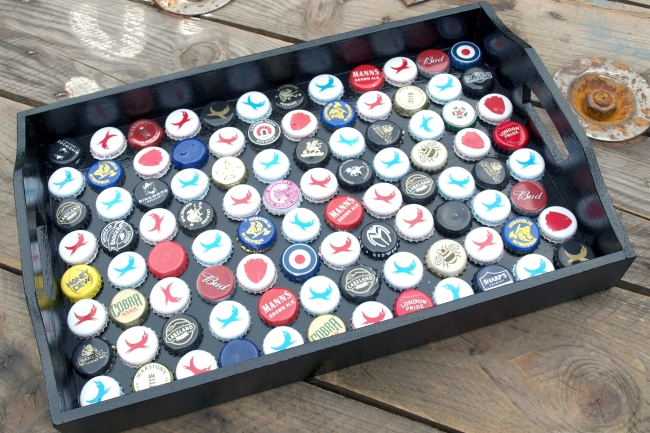
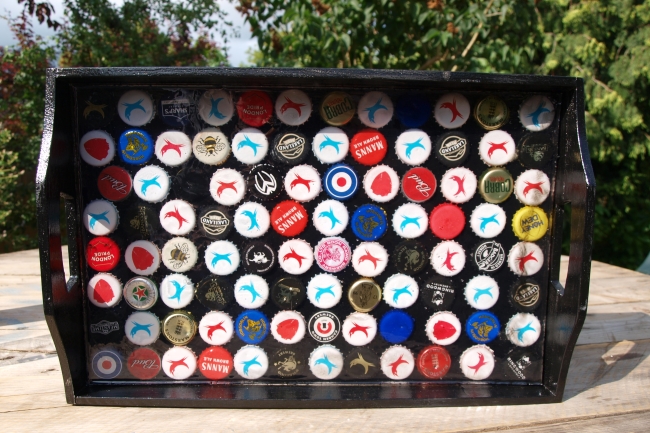
My first step was to select the bottle caps I was going to use. I first discounted all the plain black ones (except for one, which I wish I hadn’t used as it looks a little like there is one missing because it blends in with the base!) and all the ones which were very mangled. Ste’s collection is very heavy on Brewdog beers (because they’re his favourite and I even got him shares in the brewery for his birthday last year, so he’s just looking after his investment) so you can see that almost half of them have the white caps with varying red or turquoise designs. I selected all the caps which were not Brewdog, and then filled in the gaps with Brewdog ones. There are still another 20 of those or so left in his collection! In terms of arrangement, it was almost exactly half and half, so I went for an ‘every other one is Brewdog’ pattern. I think it would look good however randomly you decided to arrange them, or you could do an outside border of one type or colour, or in rows of particular types if you have enough. If you have a terrible collection with no exciting ones worth showing off, or if you are simply purchasing some bottle caps off eBay (this is a thing, you can do this!), then you could consider choosing some different colour spray paints and spraying two or three colours onto your caps and then arranging them colour-wise. I think it would look just as good, but for Ste the main thing would be that his beer ‘history’ was preserved, so I don’t think he’d have been happy if I’d done that.
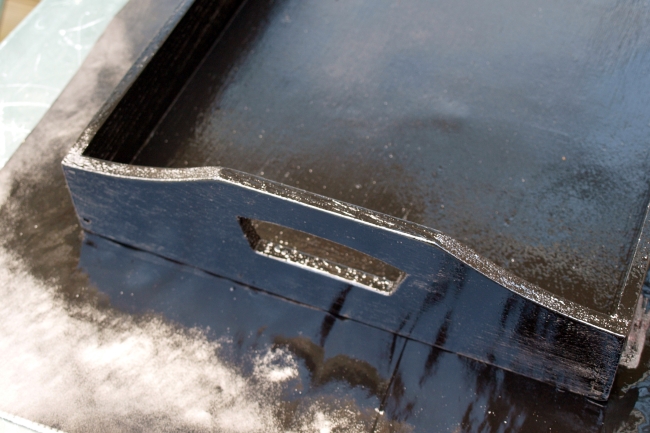
Once my pattern was vaguely arranged, I emptied the caps and set about painting. I first tried spray painting it black, but the wood was very porous so I was not getting a good finish, so a quick coat of a much thicker paint as a primer fixed that, but you may not need to do this step if your wood is already finished. I then added two good coats of black spray paint and allowed it to dry overnight.
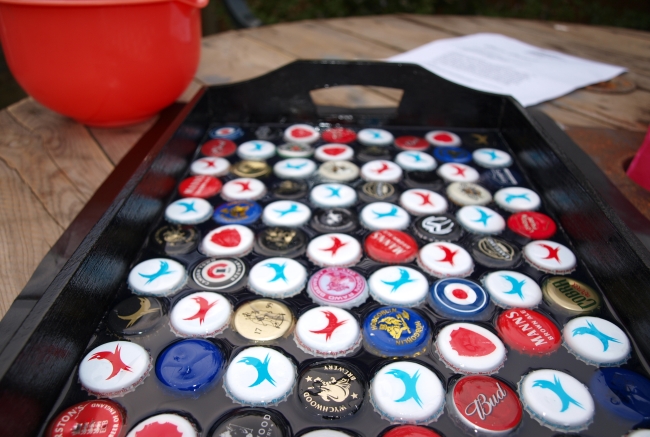
I arranged the caps in a pattern I was happy with, and then got down to the exciting part of pouring in the resin. I used a 1 litre tin of clear craft resin and a small bottle of catalyst for this project, but I think I did a slightly thicker layer than I needed to. It depends also on the size of your tray as well, but it would not matter if you didn’t quite buy enough and had to go back for more, because you cover it in thin layers and can leave it as long as you like between them I think. I mixed up the required weight of resin with the correct amount of catalyst (this will depend on your resin so read your instructions carefully) and then slowly poured it over the caps, and pushed it to the edges so they were all covered. Then I discovered a slight problem. Air, underneath the bottle caps. Shortly after the resin was poured, the caps began to float! I had to wait a little (10 minutes) until the resin had become more viscous, and then poke them all down again, at which point they stuck. What I should have done I think is pour a base layer of resin, and then add the caps in the pattern I wanted. However, you would have to be very precise in your positioning doing it this way around I think, the other way I was able to move them around until I was happy with them before pouring the resin.
The above photo is after the first pour, shortly before the caps began to float.
I let each layer cure for half an hour before pouring the next. I did three in all. Make sure that you have newspaper down under the tray whilst you do this, in case some resin leaks from the tray – I had a little pool of it under mine from the first layer, after which it was nicely sealed. It must also be noted that I did all of this outside, and the whole house still stank of resin so I would advise you to do it as far away from your house as possible, and also not to spend too much time near it. Once you have done the final layer, you need to leave it in a well-ventilated place for at least 24 hours to set completely. I left it out in the garden because I didn’t want to kill anyone with the fumes. Happily it was nice weather, but I did need to pop it under the patio table at one point to shelter it from the English rain!
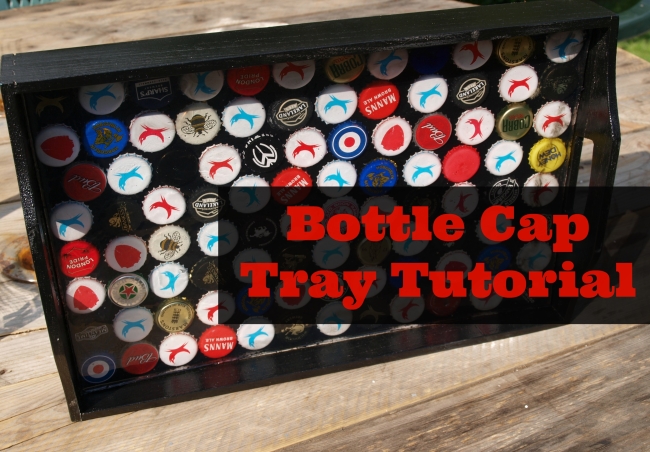
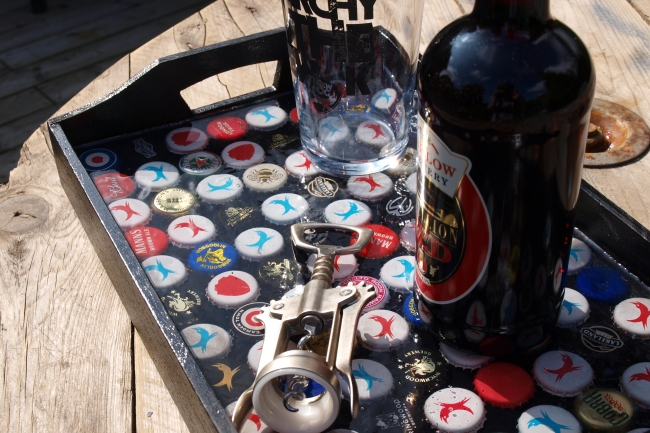
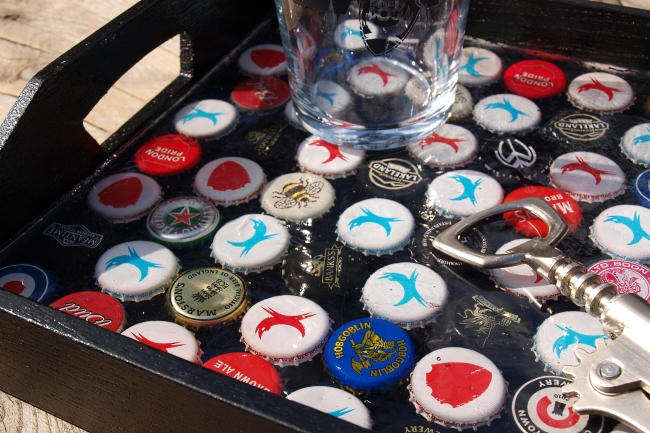
So, what do you think of the finished tray? It holds stuff, which is great, since it would be a bit useless otherwise, but I think it also looks pretty cool, almost like the caps are embedded in glass. There are a few air bubbles, which I have subsequently discovered can be removed by going over the surface with a blow torch (with a small flame) or even a rubber stamp embossing tool once you’ve poured it, but I don’t think they really spoil it too much.
Ste came home with a present for me from Copenhagen – I requested something Danish design-y, and he bought me some stunning geometric print tea towels from Hay (only my favourite store in Copenhagen!) – clever boy. I was so glad to have something to give him in return, and his reaction made the resin-headache totally worth it!
I’m linking this to DIY Sunday Showcase and Link it or Lump it at Delineate Your Dwelling.


Wow!! That is absolutely spectacular!
LikeLike
Thanks so much! 🙂 I wasn’t expecting quite such an enthusiastic reaction!
LikeLike
Why? Its great!!
LikeLike
That’s a really cool tray. Love how the caps are buried in the resin. Great idea and the boyfriend had to be thrilled.
LikeLike
I am a little in love with resin now-so many ideas!
LikeLike
What a great idea for birthday’s and Christmas! x
LikeLike
Thanks Becky! looking forward to your interview with Andy, he’s very cute! 😉
LikeLike
What a wonderfully creative tray and gift for Ste! The tray looks great!
LikeLike
Thank you. Best of all, it actually works as a tray! I was a little worried it wouldn’t.
LikeLike
Totally dig this!!!! Thanks for sharing on DIY Sunday Showcase, I pinned this to our talent board!
LikeLike
Thanks Shelly! I’ll go check it out now!
LikeLike
What a great idea for all those bottle caps! We collect them, too so pinning this as an idea to do, thanks! Found you at Cook it! Craft it! Share it! and now following on Twitter. 🙂
LikeLike
Thanks Bernadyn! It is always nice to have fun things to do with them – I’ve since picked up several other ideas about fridge magnets and drinks coasters that I want to try, but need to let him drink some more beer first because we’re almost out of caps! 🙂
LikeLike
What a great project! Thanks for linking up on Cook it! Craft it! Share it! 🙂
LikeLike
Thanks Ang. I just saw your summer bucket list printable – I am sure it was meant for little ones, but I am totally putting that up on my wall for when my summer starts the week after next…when I finally hand in my PhD thesis! I will be in serious need of some fun!
LikeLike